
Github Pages affords a worthwhile service by permitting you to host a static web site immediately from a Git repository. It’s an excellent platform for solo builders to showcase portfolios, help open-source tasks, or disseminate details about academic establishments or organizations.
Many outstanding tasks make the most of Github Pages for internet hosting, together with well-known ones like Bootstrap, NormalizeCSS, and Yelp.
This tutorial will stroll you thru the steps to create and publish an easy web site utilizing Github Pages. It’s assumed that you’ve got a primary understanding of Git and its instructions, akin to tips on how to create and push commits to a distant repository. If not, I like to recommend testing our information: 30 Fundamental Git Instructions You Ought to Know.
Let’s get began!
Step 1: Create a Repository
First, you want a Github account to create a repository. You possibly can title the repository something you want; there aren’t any particular naming necessities.

After creating the repository, the following step is to clone it to your native pc. You probably have the Github Desktop utility put in, you may simply accomplish this by going to File > Clone Repository inside the utility.
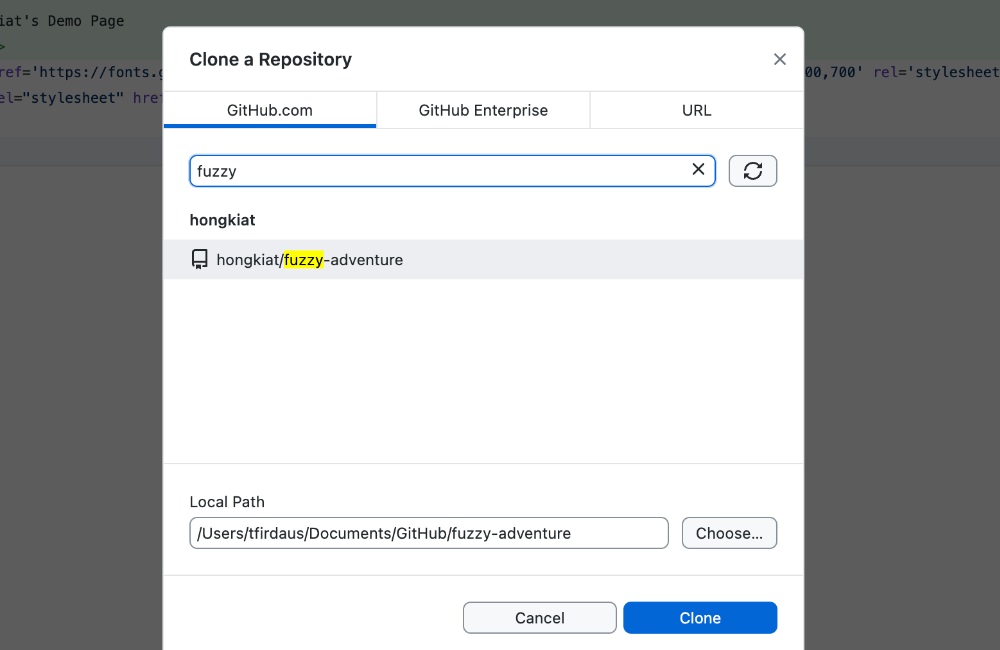
Alternatively, you may clone the repository utilizing the git command-line interface (CLI), for instance:
git clone
Step 2: Create the Essential Web page
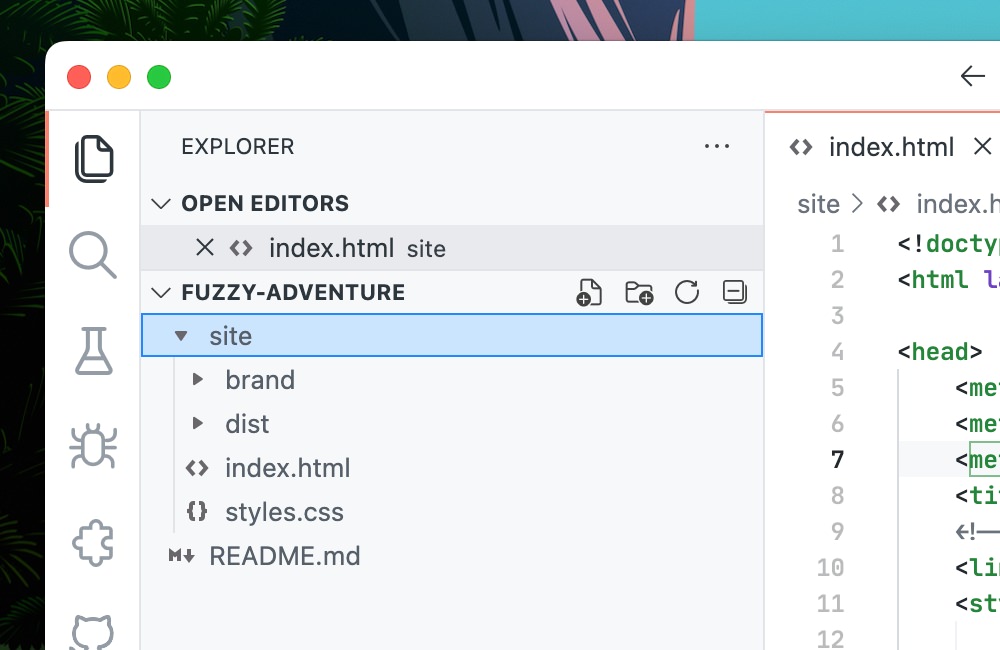
To arrange a homepage, Github primarily appears for a file named index.html. It may well additionally make the most of index.md or README.md. This file will be positioned on the root of your repository or inside a subdirectory to separate your web site from the principle supply code-commonly within the docs or web site listing.
On this instance, I’ll show including an index.html file within the docs listing, supplemented with kinds and scripts from Bootstrap.
With the information in place, we are able to now add and push them to the Github repository.
Step 3: Configure Web page Deployment
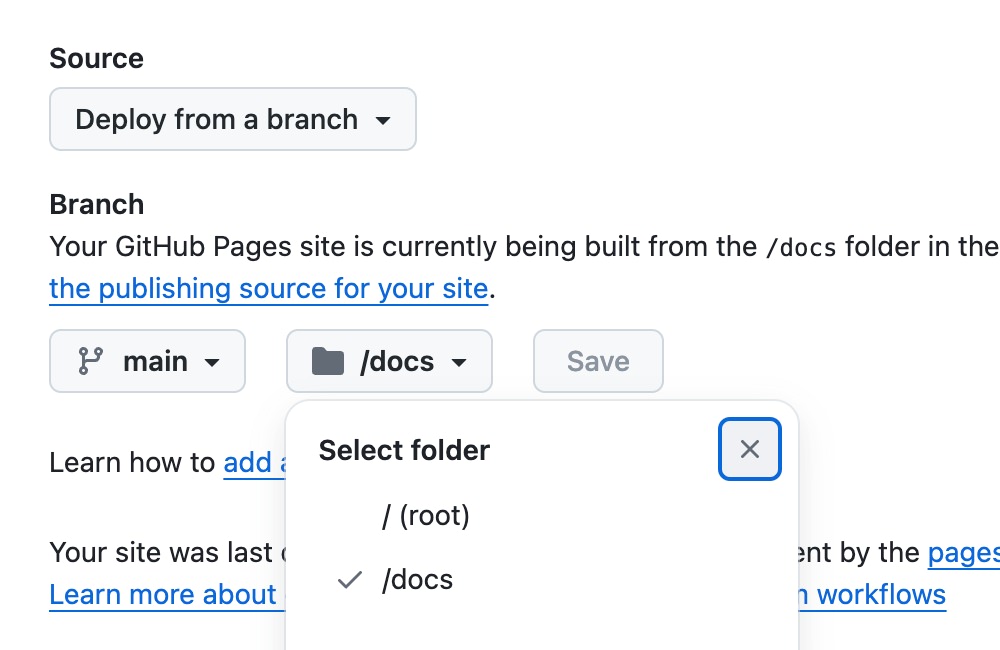
In your Github repository, navigate to Settings > Pages. Right here, choose the supply you want to deploy as Github Pages. Since we’ve positioned the index.html file within the docs listing, select the suitable department and set the listing to /docs underneath the “Construct and deployment” part.
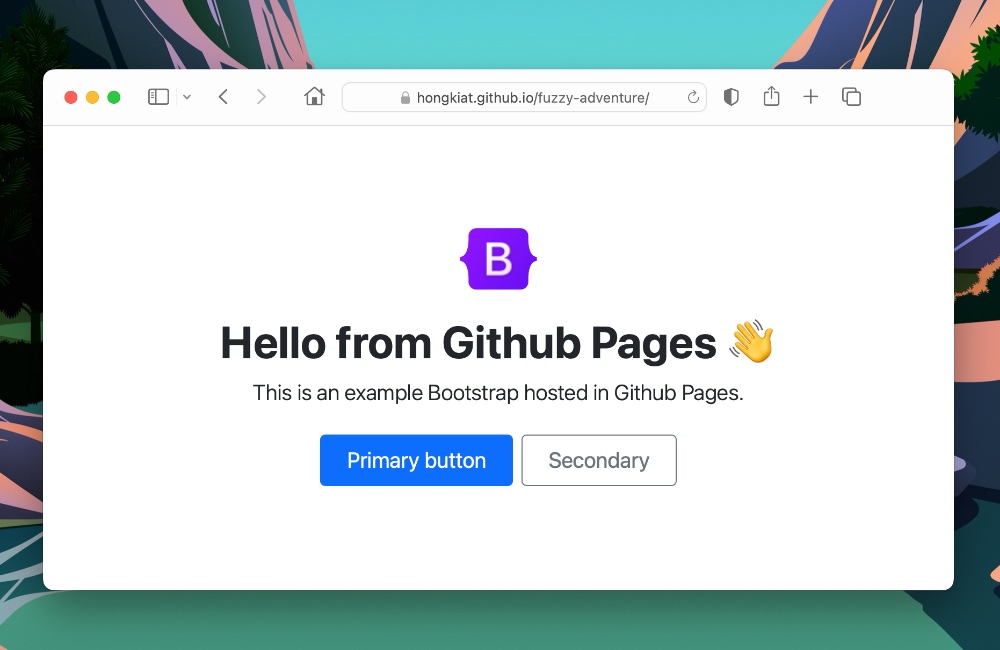
That completes the setup to your Github Pages web site. The location will likely be accessible via a URL sample supplied by Github. For instance, in case your repository is at github.com/hongkiat/fuzzy-adventure, then your Github Pages web site will likely be at hongkiat.github.io/fuzzy-adventure.
Bonus: Utilizing a Customized Area
Utilizing a customized area to your Github Pages web site gives a customized URL that’s simpler to recollect and enhances your web site’s branding. Right here’s tips on how to set it up.
Step 1: Add DNS Document
To start, add a DNS report to hyperlink your customized area to Github Pages. As an illustration, if you wish to use fuzzy-adventure.hongkiat.internet, you’ll have to create a CNAME report in your area’s DNS supervisor that factors to hongkiat.github.io.
For those who’re uncertain the place to search out your DNS supervisor or tips on how to add a brand new DNS entry, please contact your area registrar for help.
Step 2: Look ahead to Area Propagation
After setting the DNS report, it takes a while for the adjustments to propagate, which might range from a couple of minutes to 24 hours. You possibly can monitor with DNS propagation instruments like WhatsMyDNS or by utilizing the command under:
dig fuzzy-adventure.github.io +nostats +nocomments +nocmd
As soon as the DNS propagation is confirmed, you would possibly see outcomes just like this:

Step 3: Add Area to Repository
After DNS propagation completes, inform Github about your customized area. Go to your repository’s Settings, head to the Pages part, and enter your customized area within the Customized Area discipline. Github will confirm the area and set it up. As soon as verified, it’s also possible to safe your web site by enabling the “Implement HTTPS” choice.
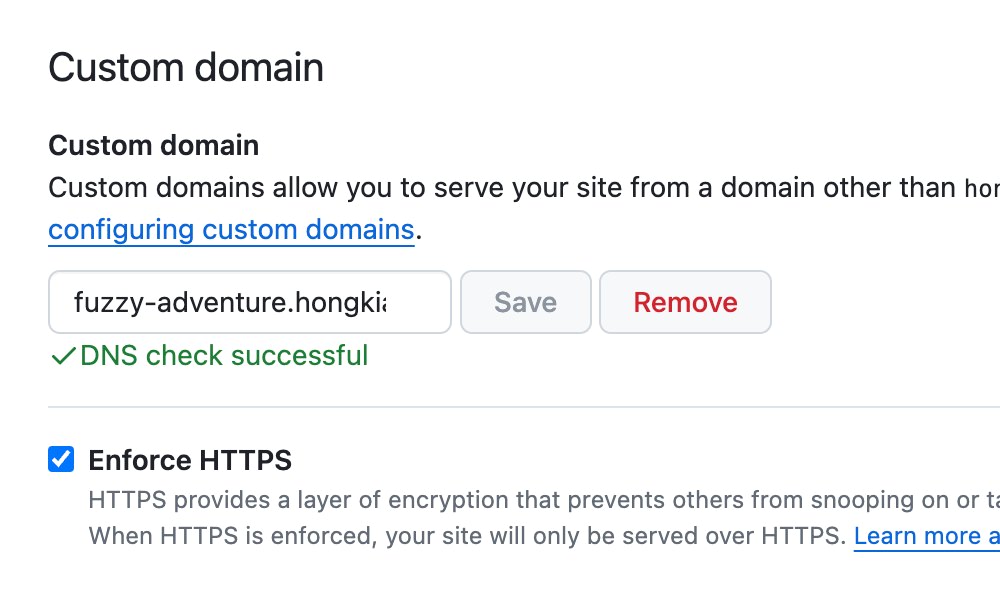
Now your Github Pages web site must be accessible through your customized area!
Leave a Reply